
Drywall finishing with a hollow grinding putty knife is all about taking it slow, matching the blade's curve to the surface, and getting that smooth, invisible seam. I've done my fair share of drywall work (thanks to a kitchen renovation last year), and once I nailed the steps, it went from frustrating to totally doable. Let's break it down step by step-no pro experience required.
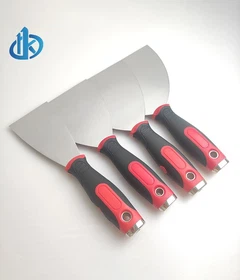
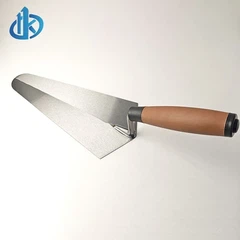
First, prep your tools and materials (don't skip this!). You'll need: your hollow grinding putty knife (3-inch or 4-inch is best for most seams-small enough to control, big enough to cover area), joint compound (I prefer "all-purpose" for beginners-it's easy to work with), a drywall tape (paper or fiberglass-paper is better for first-timers), a bucket of water, and a clean rag. Also, lay down a drop cloth-joint compound is messy, and you don't want it on your floors.
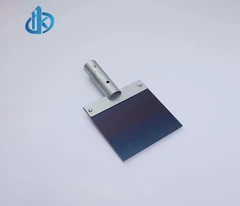
Next, tape the seams first (this stops the compound from cracking later). If you're finishing a new drywall seam (where two sheets meet), press the drywall tape along the seam-make sure it's straight and flush with the wall. For small holes (bigger than a nail hole), cut a piece of tape to cover the hole, then press it down. Now, grab your hollow grinding knife-this is where it starts to shine.
Then, apply the first coat of joint compound (the "tape coat"). Scoop a small amount of compound onto the knife's blade-you want enough to cover the tape, but not so much that it drips. Hold the knife at a 45-degree angle to the wall, with the blade's hollow curve facing toward the wall (this lets the compound sit in the curve, so you can spread it evenly). Start at one end of the seam, and pull the knife slowly along the tape-apply light pressure, and let the hollow edge do the work.
The goal here is to work the compound into the tape and smooth it over the seam-you want the tape to be fully covered, but the compound should be thin enough that you can still see the tape through it (no thick globs!). If you have excess compound on the edges, wipe the knife on the edge of your bucket, then go back and smooth those spots. Let this coat dry completely-usually 24 hours (check the compound's label, though).
Once dry, apply the second coat (the "filler coat"). This coat is thicker than the first-you're filling in any gaps or ridges left from the tape coat. Scoop a little more compound onto the knife, and hold it at the same 45-degree angle. This time, spread the compound a little wider than the first coat-about 6 inches on either side of the seam. The hollow blade's flexibility lets you feather the edges (make them thinner as you go out from the seam), which helps the compound blend into the wall (no sharp lines!).
Smooth the compound with long, slow strokes-if you see bubbles or lumps, stop and gently press them out with the knife. Let this coat dry for another 24 hours.
Then, light sanding (optional but recommended). Use fine-grit sandpaper (120-grit or higher) to lightly sand any rough spots-be gentle! The hollow ground knife should have left a pretty smooth finish, so you won't need to sand much. Wipe off the dust with a dry rag when you're done.
Finally, apply the third coat (the "finish coat"). This is the thin, final coat that makes the seam invisible. Use a small amount of compound-just enough to cover the filled area. Hold the knife at a slightly flatter angle (30 degrees) and spread the compound in even, overlapping strokes. Feather the edges even wider than the second coat-this ensures the compound blends perfectly into the wall. Let it dry completely, then do a quick light sand if needed.
A few pro tips to avoid mistakes:
Don't overload the knife-too much compound leads to drips and lumps.
Keep the knife clean-wipe it on your bucket or a rag between strokes to remove excess compound.
If the compound starts to dry on the knife, dip it in water to soften it (but don't soak it-too much water ruins the compound).
The hollow grinding knife's curved edge makes all these steps easier-no more fighting with a flat blade to get smooth coats. After my kitchen renovation, I had seams that looked like they were never there-all thanks to using the hollow ground knife the right way. With a little practice, you'll get the hang of it too!


