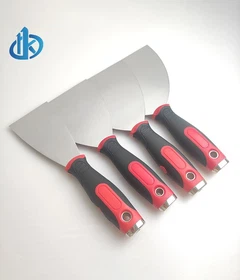

Hey DIY newbies! So you've got a putty knife in hand, ready to turn that beat - up wall into something smooth and awesome. But where do you start? Don't sweat it-I was right where you are once, and I'll walk you through it step by step.
First, let's talk prep. You wouldn't head out on a date without showering and throwing on clean clothes, right? Well, your wall needs the same TLC. Wipe off all the dust, dirt, and loose chunks with a damp cloth. If there are cracks or holes, fill those with the right patching stuff before you even think about putty.
Now, the putty itself. There's acrylic and cement - based. Acrylic is a total beginner win-it comes pre - mixed, dries super quick, and is easy to handle. Cement putty is stronger but needs mixing and takes longer to dry. Once you pick your putty, stir it good if it's pre - made, or mix with water like the instructions say. You want it to be like thick yogurt-not too runny, not too stiff.
When it's time to apply, start small. Dip the knife in, grab a little bit. Hold the knife at a slight angle to the wall, like you're trying to slide it under a thin sheet. Then spread the putty with smooth, even strokes. It's kinda like frosting a cake, but way less tasty. Work in small spots, overlapping the strokes a bit so there are no gaps. And seriously, don't press too hard-you don't wanna gouge the wall. Remember, you can always add more later.
Once the first coat is on, let it dry. Check the putty's instructions, but it's usually a few hours. When it's dry, grab some fine - grit sandpaper and gently sand the surface. That gets rid of any bumps. Wipe off the dust, then do a second coat. Apply it the same way, but go in a different direction, maybe diagonally. That helps fill in any little spots you missed.
After the second coat dries and you sand again, your wall should look pretty smooth. If there are still tiny bumps, no big deal-just do a third coat. With a little patience and practice, you'll be a putty knife pro before you know it!
our products


